Showing posts with label Entertaining. Show all posts

Monday, September 26, 2011

Menu Plan for October Birthday Get-together


We have 3 family members with birthdays in the first 4 days of October, and I am hosting a family get-together to celebrate this Saturday! Here's what I'm planning to serve:


Strategy

This Week: make pesto and freeze, make dressing and refrigerate, grocery shop

The Day Before: Cut chicken breasts, bake and frost cupcakes, make green salad, cut fruit for fruit salad

The Day of: Cook Chicken and Carrot Orzo beforehand, and keep warm in chafing dishes. I'll triple the chicken recipe and double the orzo recipe as we are expecting 13-15 people total. Set up extra table, serve meal buffet-style.

I'm hoping that by keeping the menu simple and doing as much as possible before the get-together we'll have a relaxing gathering!

Monday, August 8, 2011

2 Birthday Parties in 1 Day: Menu Plan


We'll celebrate the kids' birthdays this Saturday in one day-long event that includes both family and friends. My menu plan is as follows:
Four important things about this menu:

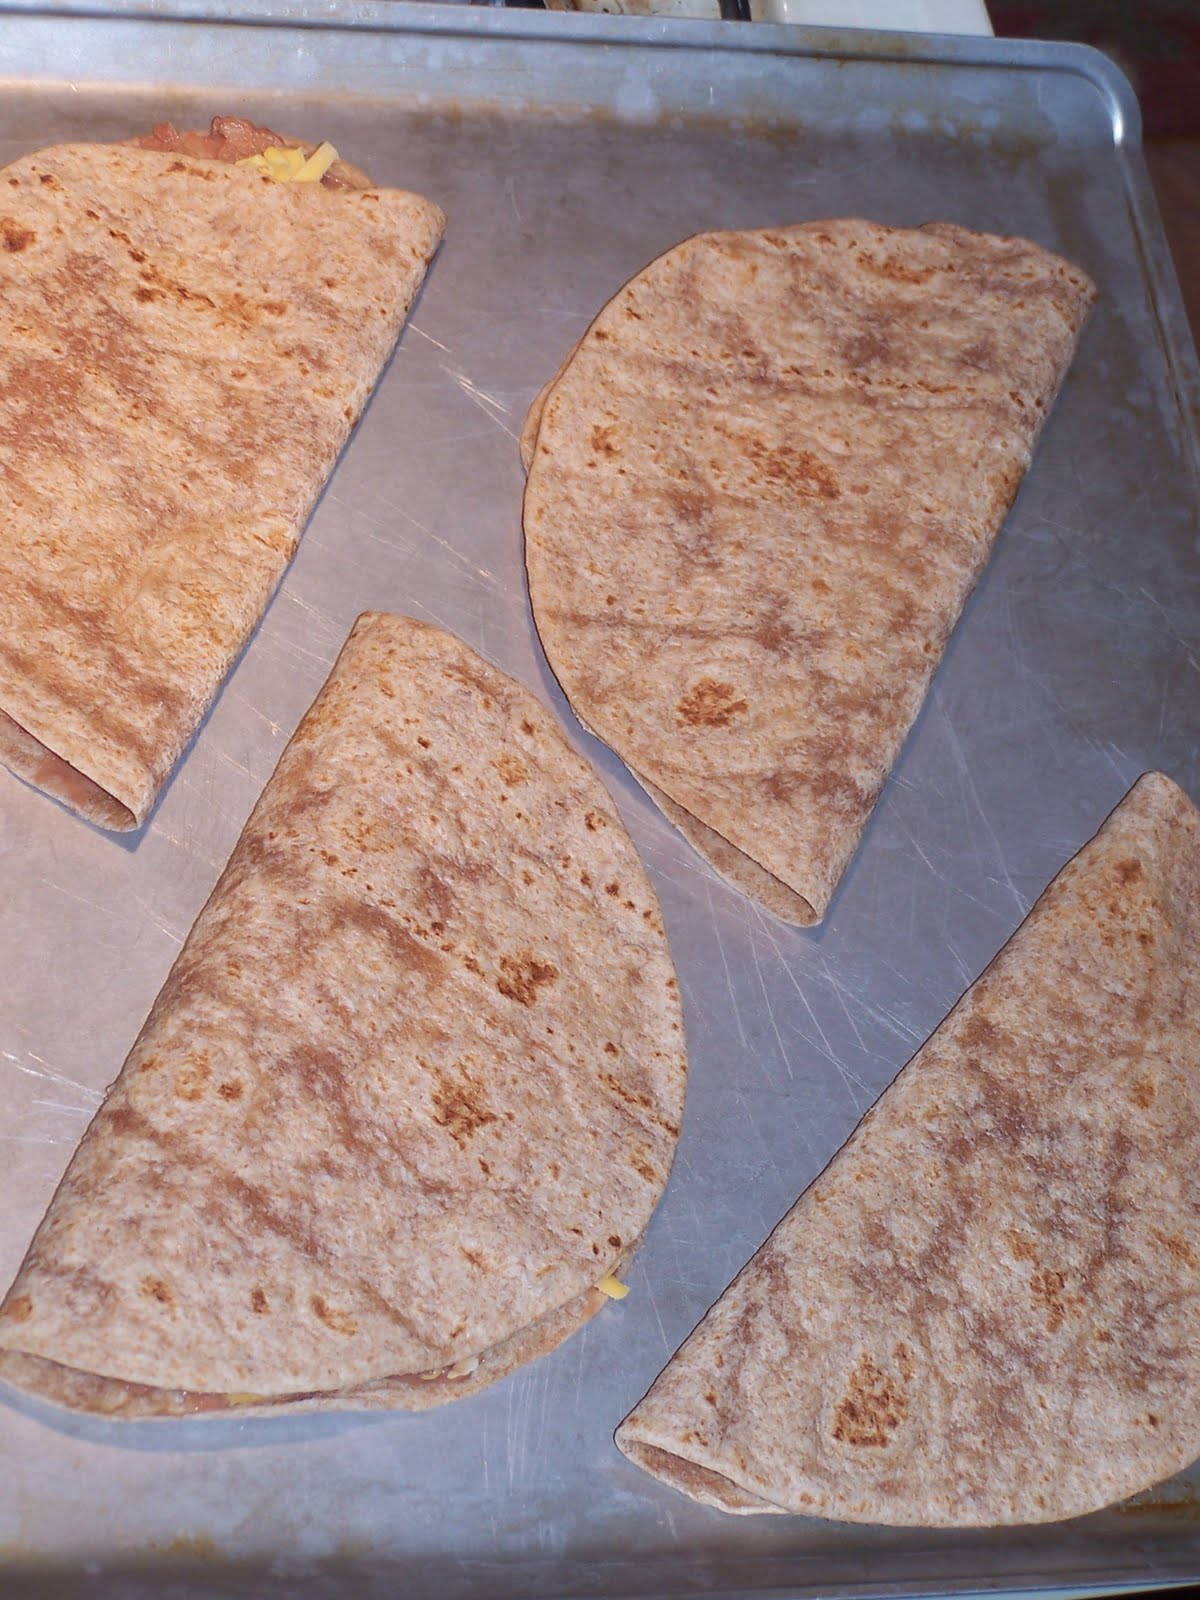
It's all small-size. The burgers are mini, the hotdogs will be cut in half before serving, and the quesadillas will be cut into quarters. I find that kids are too excited to eat much at parties, and this reduces the amount of food wasted. Grownups appreciate the small size portions, too! I set out dessert-sized plates rather than larger-sized ones--this is the one event all year where I use paper plates.

It's all finger food. I can serve up this meal... and no one needs silverware for anything on the menu!

It's portable. If any kids need to leave before we get around to singing 'Happy Birthday', I can send them home with a cupcake as we won't have a cake waiting to be sliced.

It's almost identical to last year. Why reinvent the wheel? I know my kids like these foods, and I know that I can easily serve them up on the day of the party. We eat these things all the time, but friends and family (hopefully) won't be tired of the same menu. One thing that is different is that I am switching to mini cupcakes rather that cupcakes baked in ice cream cones. I'm hoping that the mini cupcakes will be a bit less labor intensive... and less likely to start shrinking and falling over...

Was it the humidity? The extra moist cake mix? Both???? Either way, I'm pretty sure I won't have this problem with my homemade mini cupcakes!

To make things easier on the big day, I'll be preparing things little by little all week:

  • Monday: Assemble Bean and Cheese Quesadillas. I'll aim to make around 16-20, freeze them, and then make as many as are needed for the party. We can keep the remaining quesadillas frozen and use them for future meals.

  • Tuesday: Assemble Mini Hamburgers and freeze. This will be labor intensive, but worth it! I'll make 4 dozen, bake them the day of the party, then pop them into buns and add small cheese slices to half.

  • Wednesday: Make cupcake frosting and refrigerate.
  • Thursday: Shopping day: purchase melons, fresh vegetables, and breads.
  • Friday: Slice melons, arrange vegetable tray and lettuce/tomato condiment plate, and bake/frost cupcakes.

  • Saturday: Bake quesadillas and burgers in oven. Boil hotdogs on stovetop. (I'm not going to fuss the with grill, and kids don't like grill marks on their hotdogs anyway!) Assemble with buns. Serve buffet-style with fruit, vegetables, chips/pretzels, and condiments.

Wednesday, August 3, 2011

2 Birthday Parties... in One Day

August is Birthday Month in our household, as my son and daughter have birthdays that are 25 days apart. After several years of two separate parties, I am worn out! So are all our relatives and guests who make the journey to our house twice in one month for basically the same party, because of course my daughter just wants her party to be identical to her brother's!

A friend of mine made the clever suggestion to just have ONE party for both kids. What a fantastic idea! I decided that this would be the year that we have One Big Party.

My kids did not like this idea.


Despite promises of separate activities and 'Happy Birthday' singing, both kids have strong objections to sharing one party.

 I had just about resigned myself to two separate celebrations until it finally dawned on me to hold two parties all in the same day. I explained the plan to the kids, who found it acceptable, so this is the plan:

10 AM-Noon: Daughter's 5th Birthday Party (younger kids, some of whom may still take naps)
Noon-2 PM: Son's 7th Birthday Party (the older bunch)
2 PM-whenever: Friends and Relatives hang out while kids play amongst themselves
This plan means that the great-grandparents only have to make the 4-hour round trip one time (without slighting anyone) and the mother only has to serve one lunch buffet (more on that later).

Here's to hoping this works for us!

Monday, August 2, 2010

6 Years Old: The Birthday Party Menu Plan

Turning 5 years old last year. He has his ears plugged while we are singing 'Happy Birthday'

My son turns 6 years old in three days, and we are hosting a party this Saturday. Seeing as I've been lying on the beach for the past week, I'm feeling a little pressured to get everything together.

We I made the foolish mistake of throwing a large party for my son when he turned 3 years old. He has wanted the same party every year since! In a way this makes things easy, because I just do over each year what worked best the previous year, and my son actually likes the repetition. (He likes to know what to expect, particularly in intense situations.) The main challenge is balancing this party with my daughter's 4th birthday at the end of the month. Maybe next year I will combine their parties???

I'm trying my best to keep things the same from year to year without letting things get 'bigger'. Trust me, things are big enough already. In addition to same-age friends, we invite relatives, parents, and siblings. At this point (checking evite count) we're expecting over 20 people and I expect that number to increase to 40. It is a loose, unstructured party at which everyone runs around playing and jumping in the Moon Bounce (courtesy of Nana). This allows people to arrive/leave on their own family's schedule. Usually the kids come on the earlier side and the relatives come on the later side.

One thing that will make this year easier compared to last year is that I am NOT going to make a homemade pinata.

That is supposed to be The Death Star. This year I think we will go with a store-bought pinata instead.

Another thing that will help things go smoothly is that I will be serving basically the same menu as last year. Advantages of this menu include:
  • The Birthday Boy likes everything on the menu
  • The main items are easy to make ahead, freeze, and serve quickly the day of the party
  • Items are small portions appropriate for young kids, and easier to snack on/graze throughout the day
  • No Silverware Required!
The Menu Plan:
  • Mini Hamburgers (4 dozen) with cheese, lettuce, tomato, and condiments
  • Bean and Cheese Quesadillas (lots) with salsa and sour cream
  • Watermelon slices
  • Veggies and dip
  • Chips, hummus, and other snacking items
  • Ice Cream Cone Cupcakes (rather than a birthday cake): If some kids need to leave before we sing Happy Birthday, I can just hand them a cupcake!
Next I will put together my freezer cooking plan for this week; hopefully it will include some dinners as well as the food for the party.

Wednesday, June 16, 2010

Basil Pesto


I went to the farmer's market last week and I couldn't resist picking up a bunch of fresh basil so that I could make a homemade batch of basil pesto! This is the recipe that I've cobbled together after considering a number of different recipes. I like to add only a little salt and then eat the pesto on top of salty crackers such as Kashi's TLC regular crackers.

Note: This pesto is garlicky. Feel free to reduce the garlic if it seems like too much for you.

Ingredients:
  •  1 bunch fresh basil, washed and mostly dried (about 2 cups packed leaves)
  • 1/3 cup pine nuts or walnuts (I use pine nuts mostly)
  • 3 cloves garlic (or less if you are not fending off vampires)
  • 1/2 cup olive oil
  • 1/2 cup shredded cheese: Parmigiano Reggiano or Pecorino Romano
  • salt and pepper to taste
Add basil leaves and nuts to food processor, pulse to combine. Use a paddle to scrape larger pieces down into the mixture. Add garlic and pulse further. Add olive oil in a small stream while processing. Add shredded cheese and salt/pepper to taste. Sprinkle additional nuts and cheese on top for garnish.

Serve immediately, or cover with layer of platic wrap or waxed paper before refrigerating.

Tuesday, May 11, 2010

Mini Hamburgers

Recently at dinnertime we went around the table to find out what each person would eat for dinner if they had to have the same thing every night. My husband would eat a bowl of cereal and a peanut butter and jelly sandwich. My daughter (age 3) would eat... candy. My son, on the other hand, would eat Hamburgers and French Fries. Every night! (Me? I would not be able to eat the same thing every night, so I didn't even answer.)

Here is a recipe for Mini Hamburgers that I put together last summer when my son requested hamburgers for his birthday party. It didn't make sense to me to serve a full-size hamburger to each preschooler at the party just for them to take two bites and run off to play some more.

I hunted around online and found various mini hamburger recipes that looked interesting, but I ended up taking just a bit from each recipe I read to create something that would work for me. I didn't want to spread raw beef on the rolls, nor deal with a bunch of tiny burgers on the grill, so I bake them in the oven, sort of like meatloaf!

Ingredients:
  • 1 pound ground beef
  • 1/2 cup onion, finely minced
  • 1/4 cup panko (breadcrumbs)
  • 2 T parsley or other herbs, finely minced (above I used oregano because I need to let my parsley grow--I've been chopping it too much!)
  • 1/4 tsp salt
  • 1/4 tsp pepper
  • 1 egg
  • Whatever else you want to add that you might add to a meatloaf! (I might try some finely shredded hard cheese next)
  • Dinner Rolls (2-3 inches across) we've been using the 100% whole wheat dinner rolls from Trader Joe's.
  • Small cheddar cheese slices
First saute minced onion in a small skillet with some olive oil until translucent.

Have ready a rimmed baking sheet--I like to line mine with aluminum foil. Combine all ingredients in a large mixing bowl. Gently mix everything together with your hand just until blended. Pick up a small amount of mixture (apprlixmately 1/3 cup) and gently shape into a patty 3-4 inches across and 1 inch thick. Try to handle the meat gingerly--don't compress the meat mixture or press it hard or you will have Mini Hockey Pucks to eat! I shape them with my thumb and index finger, like this:


Arrange on foil-lined baking sheet 1 inch apart and bake at 375 for 20-25 minutes. (Optional: place small cheese slices on top of patties for last few minutes of cooking.)

In the mean time, slice rolls and heat in oven alongside patties for 10 minutes. Remove both meat and rolls from oven and place one patty on each roll. For serving on a buffet, I like to stack the burgers vertically in a casserole dish and keep it warm on a heating tray. Serve with miniature toppings and condiments.

You can make these in advance by preparing the patties then refrigerating or freezing between layers of wax paper. This comes together quickly and easily when preparing them for a party!

Monday, April 5, 2010

Family Feast For Fourteen

Well... maybe not fourteen specifically. A more accurate title for this post would be 'A Family Feast for Approximately Ten to Fifteen depending on who makes it,' but I thought the alliteration was more intriguing.

Anyway, this is last-minute planning for a casual gathering this Tuesday night. The meal needs to have vegetarian options and be reasonably kid-friendly as well as have easy final preparation steps.

I have to admit I was having Meal Planning Block coming up with this one... should I make Lasagna again? I think my in-laws like my lasagna, but maybe we should do something different this time.

Finally I followed the sage advice to look to what you already have on hand, and I recalled that I have a bunch of marinated chicken as well as a package of tofu to use up. We have the grill up and running as of yesterday, so I can grill chicken and serve it with the early spring standbys: roasted baby red potatoes and asparagus (I'll do something a bit different with the tofu if the vegetarians are able to attend). Add a salad with homemade dressing, an appetizer, a dessert, and a drink setup and dinner is done.

Whew, I thought that was going to be harder than it turned out to be! Now I am freed up to clean my filthy house that I didn't touch last week.

Wednesday, March 17, 2010

Gougeres: Wonderful Cheese Puffs!

It's not the best picture, but it was the only one I was able to snap before these things were inhaled at the play group I held this morning. I've had this recipe for a while, but only recently did I rediscover it and decide to give it a try. WOW! Make them at your own risk!

Tuesday, March 9, 2010

Sunday Brunch: Final Prep

The Brunch that we planned to have in February was snowed out, but we rescheduled it for this Sunday, March 14th! Since I already planned the menu, I just need to figure out what ingredients I need from the store and schedule when I am going to prepare everything this week.

Already prepared: I have a loaf of strawberry bread in the freezer. I wasn't planning on serving strawberry bread, but I might as well since I have some made up! I'll add a load of banana bread to the freezer today.

Prepare and Freeze: Time to try to make those Bouchons au Thon again--in the new mini muffin pan. I'll also slice and freeze the mini bagels I intend to use.

The Day Before: I'll make the Potato Kale Quiche, the Oatmeal Cookies, cut the fresh fruit, and prepare the Make Ahead Strawberry French Toast.

The Morning of the Brunch: I'll make the Summer Squash Frittata, squeeze the citrus fruit for fresh juice, toast the bagels, and cook/reheat everything that needs to be cooked/reheated.

The paperwhites I planned to use for decoration are dead and gone, but I did have 8 more bulbs left that I am trying to force right now. (I usually force more over the holidays, but I couldn't--and still can't--find my large containers!) Hopefully all this nice, sunny weather we are having will hurry them along... if they're still alive, that is.

I'm really glad I had everything planned out in advance--even though I didn't use the plan when I thought I would, it is still here, written down, so I don't have to start over from scratch. (A Secret: You can use the same menu plan more than once... with different guests! Only your family will know the difference, and they won't complain if you're making something that everyone likes.)

Thursday, March 4, 2010

Time For Tea

I have a confession to make. The reason I didn't complete my Freezer Cooking Day plan earlier in the week was because I promised my daughter we would have a tea party!

My grandmother used this set of china specifically for hosting tea parties with me when I was little. The mugs of the set are tiny--like a cappuccino mug, which makes them perfect for little hands. She gave me the set when I outgrew the tea party stage, and I have saved them over the years in anticipation of a day like the one the other day.

I decided that I wanted to drink an actual cup of tea during our tea party, so I made some Cranberry Apple Tea with a few tea bags in a tea pot. We needed something to put in the cream pitchers, so we used apple juice, which could be poured into the tea to cool it--and also to sweeten it for the non-tea drinkers at the party (like my daughter). I scrounged up a few snacks for us to munch on--I mean, to eat daintily while talking in 'proper' voices.

Our other guests included some of Julie's favorite animal friends:

Including Mommy Dinosaur who likes to eat Goldfish (she has one in her mouth):


And I was required to wear at hat.
It was a lovely party!

Friday, February 26, 2010

Menu Plan for Vegetarian Dinner

We are having a few friends over for dinner this weekend, and one person is vegetarian, so I need to come up with a menu that is meat-free yet filling and nice enough for dinner guests. Here is what I've come up with:
  • Appetizer: Gougeres (Cheese Puffs) These are so good! also veggies w/hummus Darn it! I ran out of time to make these. We had a cranberry goat cheese log w/crackers and grapes instead, courtesy of Trader Joe. (I don't want my guests to read this and get confused!)
  • Salad: Caesar Salad with homemade dressing
  • Main Course: Lasagna (if I omit the ground beef, it's a vegetarian dish!)
  • Dessert: Strawberry Bread (Part of my menu from the Once a Month Mom cooking contest. I find out on Monday if my menu was selected!--ETA: I didn't win, but it was still fun!)
 This will be a simple get-together, no drink set-up or other elaborate plans, just having people over for food and friendship.

I'll share the recipes for the Caesar salad dressing and Strawberry bread next week.

Tuesday, February 16, 2010

A Menu Plan for Julia Child

My book club is reading My Life in France by Julia Child, and it is my turn to host. I had this wild idea that I would make some of Julia Child's recipes to eat at our meeting (the host provides snacks). After some brief research, I've decided that I don't have the time or concentration to attempt Julia Child recipes at this point in my life. Sorry, Book Club folks.

 
But I'm going to make it up to you! Check out the recipes for these Salted Caramel-Chocolate Cupcakes! I have been thinking about this recipe for weeks now, but I didn't have a good excuse to make it until now, I've been too busy making cookies anyway. Also, I first had to obtain a new mini muffin pan after that unfortunate catastrophe with the last pan.

 
I'll also have some various savories as this menu will also serve as dinner for my family. Hmmmm... let me take a look around and see what we have on hand.
  • Cranberry Goat Cheese log with various crackers
  • Assorted fresh vegetables with dip
  • Turkey Tortilla Wraps
  • Mini Stuffed Potatoes
  • Strawberry Bread
  • The hopefully delectable cupcakes as mentioned above.
There! That should feed everyone. They probably won't miss the Julia Child recipes if I use plenty of butter, right?

Wednesday, February 3, 2010

Let's Have Brunch: The Drink Setup

We've covered the meal plan, we've started the paperwhites growing (they're coming along nicely! You can see some in the picture below.)

The other main steps are to clean the house (I won't bore you with those details!) and also how to have everything set up the day of the party.

One thing that has helped us simplify party setup is that we arrange the drinks the same way for every gathering. We use an ice bucket for plenty of ice and put drinks out at room temperature, including water, which seems to be the drink of choice these days at almost all our parties. This saves the limited refrigerator space for foodstuffs when I don't have to worry about chilling drinks (other than white wine, etc.) I have a carafe I fill with boiling hot water to make tea (for tea drinkers) and our coffee pot is another carafe; we simply brew the coffee and it stays warm in the container. We set out cream and sugar with teabags and cups, and guests can help themselves. We bought 2 dozen plain, cheap stackable glasses from Ikea some years ago so that we don't have to rely on paper cups for cold drinks. Everything more or less fits together on our bar in the dining room:


For a larger party, say in the summer, we might add coolers filled with kid-drinks (water, juice boxes) or Dad-drinks (beer, soda).

For brunch this Sunday, I plan on making fresh squeezed orange juice and using it to make champagne mimosas, in addition to the standard drink fare you see pictured here.

We have set up this drink arrangement so many times now, and it works really well! Our guests can help themselves to a wide variety of drink options without having to invade the kitchen; and the arrangement is something we can set up in our sleep we have done it so many times. This allow more time and energy to focus on cooking the food! Which is what I need to focus on next...

Friday, January 22, 2010

Frugal Flowers during Winter Months

One of my favorite projects to do with my kids each winter is to force paperwhite narcissus bulbs in small containers. My daughter and I put these together today so that they will bloom for the brunch we are hosting in a few weeks. They are striking when planted individually or in groups, and have a fragrant scent when the flowers bloom. These also make fantastic affordable gifts for relatives, hostesses, or teachers.

Gather your materials and prepare to plant the bulbs about 3 weeks before you want them to bloom. You will need:


  • A Small Assistant (optional)
  • Small votive candle holders: here is an example of the size I use to plant one bulb per container--one bulb is all you need! I prefer a round rim shape to hold the rocks inside. I am in love with some votive holders sold at Michael's that have crackled glass and are painted gold around the rim, I believe those are approximately $3 apiece, or the plain glass ones such as the example are around $1 each. You can also put up to 4 bulbs in a slightly larger glass container; the 3 larger containers you can see in the photos were also $1 apiece.
  • Paperwhite narcissus bulbs: I can usually find these at local garden centers for about $1 apiece in November. You can also purchase them in larger quantities online for less per bulb. Home Depot sells kits for $4.99 that come with 4 bulbs ($1.25 apiece, but you don't need the container etc. that they include with the bulbs) they may still have them in stock and discounted now. They are 'in season' at stores in November. I bought mine in November online and saved some in the garage so they stayed cold and fresh. You can also find them online at this time of year, but you will have to hunt around for a good price and watch out for shipping costs.
  • Small glass rocks or aquarium gravel: I like the flat round decorating rocks sold at Michael's and similar craft stores, but I have also used beige aquarium gravel in the past. I reuse the rocks/gravel each year (unless I give the votive away as a gift!)
  • Small watering can: if a young person is helping you!
  • Sunny spot by a window
Steps:

1. Place a small amount of rocks or gravel inside the votive holder. Place a narcissus bulb in the center with the stem facing up and surround the bulb with additional rocks to hold the bulb upright. If you're using a larger container, position multiple bulbs with stems facing upward, placing rocks between and around bulbs.

2. Add water to almost fill the votive. It should cover about 3/4 of the bulb or so.

3. Place votives in a sunny place. Check water levels every few days and add water as needed.


4.Withing a week or so, the bulb stems should turn green and start to grow. The flowers bloom in about 3 weeks. STOP WATERING just as soon as the flowers bloom; this will keep your paperwhites standing upright. If you continue to water, the stems will be too heavy and the paperwhites will fall over.

I find that my paperwhites will smell nice for about a week after they bloom, then the flowers will dry but the stems will stay green (without watering) for about 3 weeks after the flowers dry out. The paperwhites in the first picture are over 6 weeks old and bloomed over Christmas. My daughter and I took the old bulbs out, composted them, and put the new bulbs in.

Using a $1 votive and finding the bulbs for $1 can make this an incredibly affordable gift--you can use any small container you have on hand if it will hold water to reduce the cost even more. The only additional cost would be for the rocks or gravel placed around the bulb. Today I reused votives and rocks that I've owned for years, so the only cost for this project were the paperwhites, which I paid $.63/bulb (23 bulbs = $14.49). This made a total of three 4-bulb containers and eleven single-bulb containers: 14 potential gifts! I'm keeping most of this batch, though.

After the paperwhites are growing steadily, I'll place them around the house: single votives in the bathrooms and clusters of 2-3 votives on tables around the main living areas. I won't feel the need to buy cut flowers for the brunch, and we'll enjoy the paperwhites until March!

Thursday, January 14, 2010

Opening your Home to Friends and Family

If you've read previous posts about my progress (or lack) in The Pantry Challenge, you'll have noticed that I had a number of food stuffs that were originally intended for/left over from a holiday party. We hosted four gatherings in the last 2 weeks of December, and there were two additional gatherings we had planned that had to be cancelled due to bad weather. I also hosted a book club meeting and several play dates in December (both involving coffee and snacks). These numbers don't include the various gatherings that we attended at other people's homes. It was a busy month!

Yes, I love to entertain. I think it is an important part of home life that doesn't happen as frequently as in the past because people are intimidated by the potential work and expense, which really aren't as bad as they may seem. It seems easier for people to meet up at a restaurant if they are getting together socially at all. Don't get me wrong, I really like restaurants, but eating at restaurants all the time can be expensive, both financially and calorically--is that a word? If you are hiring a sitter to watch your kids while you go out, the expense goes up even higher. If you are bringing your kids along, the food options for them are limited, as well as the amount of time you have to work with before your kids can't stand sitting still any longer and start running around the restaurant like maniacs (or am I the only one with this type of child?).

I also find it difficult to have a substantial conversation at a restaurant that is crowded and loud, whether my kids are there or not. The art of conversation, the opportunity to get together face to face to exchange ideas or to just laugh with one another is so valuable, and I want to do what I can to encourage people to see their home not only as the place they go to eat, sleep, clean, and relax, but a place to connect and socialize with friends and family.

With that in mind, I am going to write a series of posts that explain my strategies for entertaining. I hope that sharing what I know will inspire someone to host some sort of get together that makes them feel more connected to someone they know. An added bonus would be to help someone feel more comfortable with the idea of entertaining at home once you see how easy it can be. 

The first get together I want to share is a Sunday Brunch I am hosting the first weekend in February for my husband's coworkers. I'm expecting 8-10 adults and 1-3 kids (not including my own family--one spouse and 2 kids!)

The benefits of hosting a Sunday Brunch (that I can think of right now) include:
  • You have all day Saturday to prepare (if you don't prep in advance, which is what I prefer to do)
  • If you have kids, the gathering doesn't interfere with bedtimes. The kids may play better together because they are fresher than they would be at the end of the day.
  • Brunch foods are often easy to prepare, easy to prepare in advance, and affordable (eggs!)
  • You have plenty of time to clean up before it gets to be The Middle of the Night. (And, in this case, before the Super Bowl starts...)
  • You don't need to have everyone sit down together, like at a dinner party. People can sit whereever, eat as they feel like it, and hang out!
General tips for planning a brunch:
  • Keep it small. 12 adults is about the maximum for us indoors--unless we are hosting my husband's family, that immediate family totals 24 people including ourselves. Those parties are pretty busy! A brunch with only a few guests can be a relaxing get together. 
  • Don't invite guests any earlier than 11 AM. This could give your guests the opportunity to attend services Sunday morning if they do so, and also gives you adequate time to set up. (Feed your kids as usual when they wake up so that the brunch is their lunchtime.)
  • Serve foods that can be prepared in advance. Omelets or pancakes are kitchen intensive down to the final minutes before serving. Try quiches or casseroles made in advance, as well as breakfast breads and bagels. I also try to focus on foods that are easy to eat and that can still be enjoyed at room temperature. Be sure to check out potential allergies with guests--I usually ask people to let me know if there is anything they can't eat.
  • Start planning about 3 weeks in advance. Invite your people (phone, email, or Evite) and find out who is available to come. Plan out a menu and a strategy for getting everything ready. Don't get in over your head; try to make selections that are Easy and Affordable. This is where we will start in my next post.