Showing posts with label Tips. Show all posts

Wednesday, September 14, 2011

How to Slice a Shallot


When I first came across a recipe containing shallots, I found myself feeling particularly gourmet. Dicing the darn things took forever, and as far as I can tell, taking forever is the main criteria for a gourmet recipe. It seemed like I spent forever peeling and dicing them!

But they're delicious; they add a garlicky onion-type flavor to dishes, so I'm glad that I've found a faster way to deal with them, which leads me to use them more often, such as in my Shallot Green Bean recipe.

First, slice the root end off the shallot.
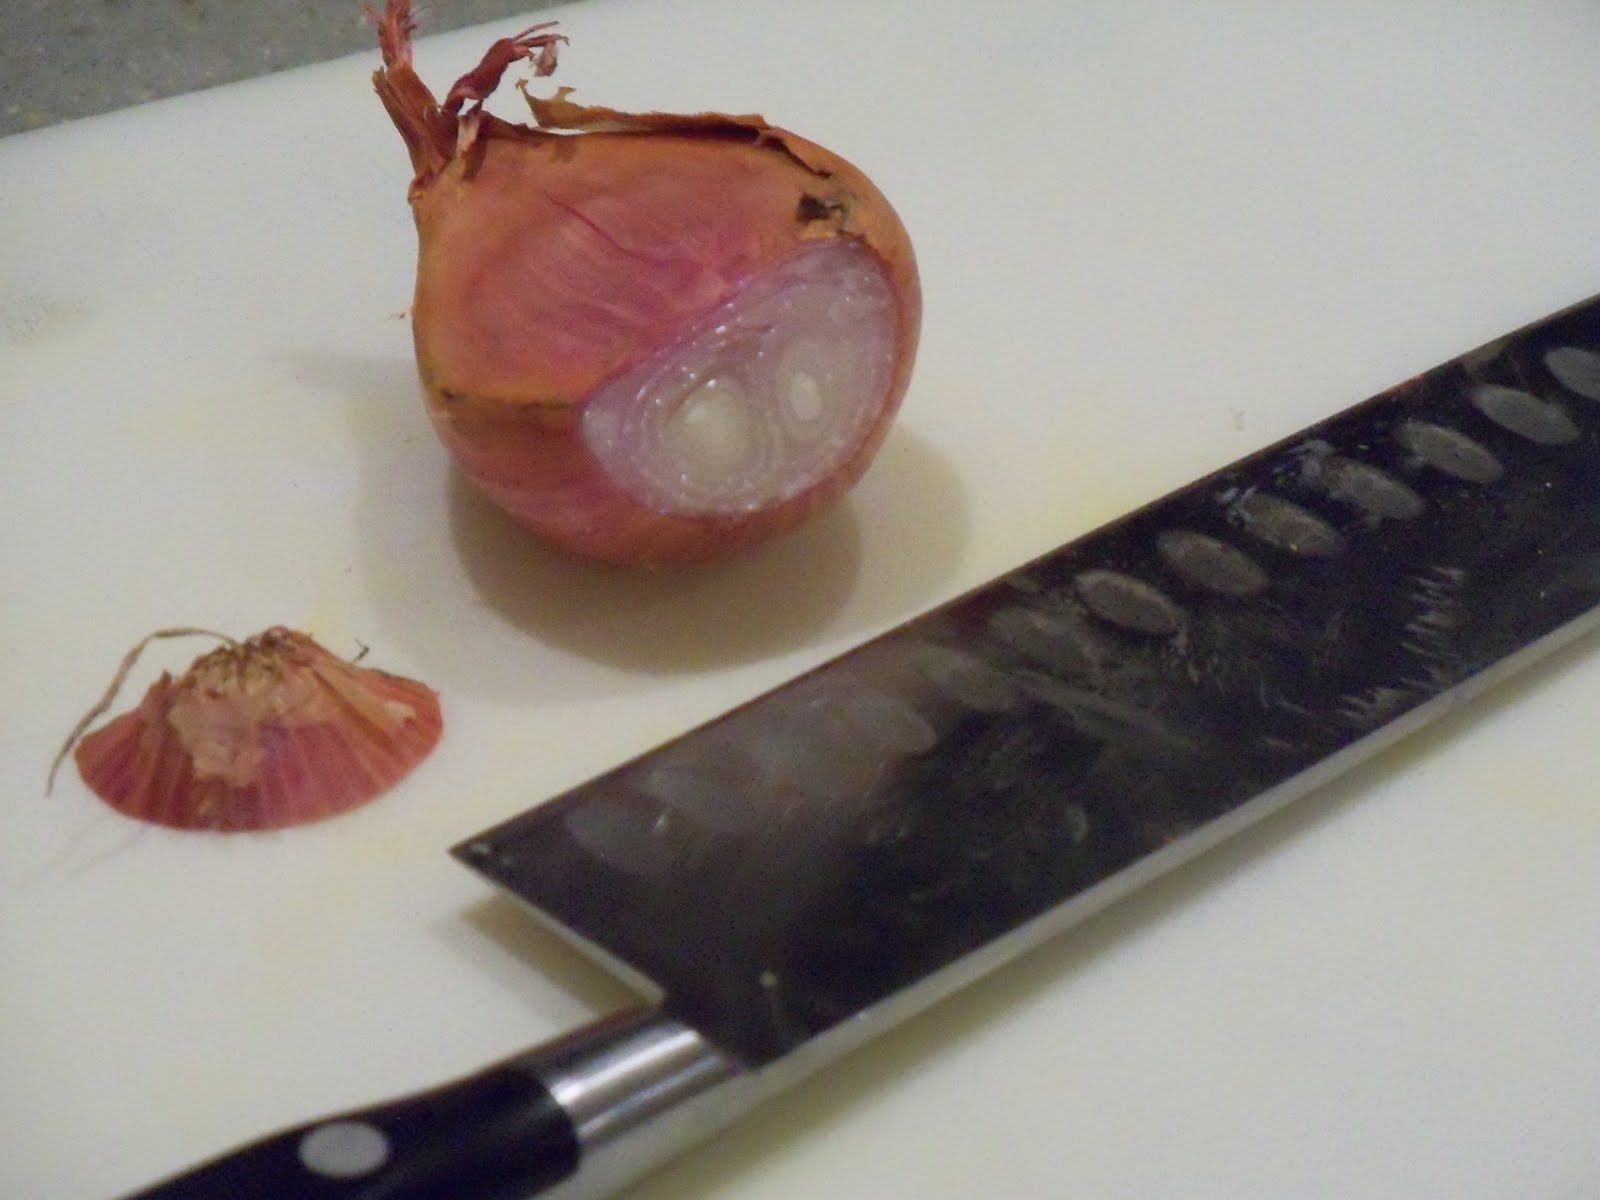

Peel the dry layers off the outside of the shallot.

Hold the shallot at the top end, and use a very sharp knife to very thinly slice the shallot into discs.

Optional: place the discs in a pile and quickly chop the pile into smaller pieces.

I tend to leave mine as discs, and let them separate while sauteing them in olive oil. Be careful; they brown and crisp up quickly! They're delicious!

Linked to WFMW.

Wednesday, August 31, 2011

Easy Pie Crust Protection

Potato Kale Quiche

When I make a quiche, such as this one, the crust sometimes bakes up faster than the filling, and I find myself fiddling with wide strips of aluminum foil to protect the edges from getting too brown.

At the same time, if the quiche crust is very full, some of the filling may spill over the sides of the pie dish.

A solution to both problems is to set the pie dish on a large piece of aluminum foil on top of a rimmed baking sheet. Later in the baking process, wrap the edges of the foil up around the crust edge to slow the browning process. It's much easier to wrap the edges with foil that is held in place underneath the pan rather than fiddling with smaller pieces, then the filling can finish baking.

At least it worked for me!

Monday, April 11, 2011

Freezer Cooking: Tips for Meat

Today I spent some time prepping the meat we are planning to use for tomorrow's freezer cooking day. I wish I could take credit for this bright idea! My friend suggested that we cut the meat and separate it into freezer cooking bags in advance. What you see here is approximately 15 pounds of chicken (my share) and 6 pounds of sirloin (which we are splitting in half). Tomorrow we'll add marinade to these cuts of meat and they will be ready to go in the freezer.

Some additional tips for cutting up large quantities of boneless skinless chicken breasts:
  • Open the packages and look at all the breasts before starting to cut. I prefer to reserve the smaller, neater breasts for the recipes that call for a whole breast to reduce portion size. To reduce size even further, I'll cut off the tenderloin. Identify the small breasts and bag them for the appropriate recipe.
  • Cut some of the chicken for the same recipe in different ways. For instance, after I reserved the smallest breasts whole, I cut some of the larger breasts into large chunks to make kebabs. Sometime I also cut chicken breasts into tenderloin/strip-size pieces, depending on the recipe and where I plan to cook it (grill or oven). Another cut is to slice the breast in half horizontally to make thin, flat pieces, which are good for broiling or stove-top cooking. Marinating these different 'cuts' of chicken in the same marinade is easy, and you will end up with more variety when serving the meats for dinner.
  • This 'messy' double breast is at least ten ounces, and has little pieces hanging off the underside all over. Best to cut it up!
  • Save the largest, 'messiest' pieces for cutting into bite size pieces for stir-fry. Somehow my packages of chicken always contain at least one piece that is either falling apart or has shreds of meat hanging off in every direction. These pieces would be tough to grill, slice, or chunk into even-size pieces, so they work best as bite-size pieces for a stir-fry.
I bagged everything up and stored it all together in a large plastic container. Now I just need to dice some onion and grate some fresh ginger to finish preparing for the big day.

Friday, January 7, 2011

Stockpiling Strategies: A Series

I am sure I am not the only person who has reached for the shampoo in the shower... only to realize suddenly that the bottle was used up during the previous shower. Or to simultaneously discover that I am out of both workout clothes AND laundry soap at the same time.

Before I had kids, these pitfalls were no big deal. I could easily run to the store whenever necessary to pick up shampoo and laundry soap... often paying full price for the item.Now that I have young kids, a trip to the store has become more challenging to impulsively add to the schedule. It seems like the hardest shopping trips are the ones when I only need a few small items.

In the past year, I've managed to simplify my errand list by purchasing large quantities of each item that we regularly use all at once--at a discount price. This has helped me to cut down significantly on:
  • stressful last-minute dashes to the store when we run out of something crucial
  • paying full or high prices
  • trying to keep track of everything we are 'low' on
  • getting stuck in the parking lot trying to wrangle kids and large items (toilet paper packs, etc.) at the same time
By removing the pressure to purchase something that we are going to use immediately, I am freed to purchase stockpile items when it is convenient for me to do so (aka when the kids aren't with me) and to wait for lower prices. Often I am only actively looking for 2-3 types of items at a time during any given month, rather than buying 10 different items each month. It feels almost luxurious to nonchalantly reach into the cabinet and produce a fresh toiletry when the one my child is using has run out--definitely less stressful that searching for an alternative or adding an unexpected shopping trip to an already hectic schedule!

Here are a few stockpiling tips that I've found to be helpful:
  • Identify stockpile-friendly items. For my household, these items include paper products, laundry soap, dishwasher soap, certain cleaning supplies, dental hygiene supplies, certain non-perishable foods, and my special brand body wash.
  • Test before stocking up. Be sure that you and your family like the brand of the item that you are planning to stockpile. I tend to stick with familiar brands when stockpiling as I want a quality product that my picky eater and soap-sensitive kids will tolerate.
  • Focus on stockpiling only 2-3 items at a time (or fewer!) The idea is for stockpiling to simplify your life, rather than overwhelm your shopping trips and your budget. Look for sale prices, and start getting a feel for what is a 'good price' and what is a 'great price'. Stop buying the item when it costs more than you want to spend.
  • Don't forget to shop online! Especially when shopping for items that don't typically go on sale, I check online and see if I can get a better price at an online retailer. If I can use a discount code and get free shipping, I can sometimes find prices that are better than what I would find in my local stores. I also shop online for certain items that local stores may or may not carry. This reduces my time spent going from store to store looking for the correct size vacuum bags, for example.
  • Store your stockpiled items together in a logical, accessible place. The stockpile won't be effective if you don't remember where you put it! It will be even more effective if other family members know where to look for things, and will help cut down on the, "Honey, do we have any [item]" conversations.
  • When the storage area is full, stop purchasing the item. Other great discounts and sales will come along eventually. Don't let your stockpile exceed the size of your storage space and spill into your living space (and your life!).
  • Rotate your supplies. Use older items before using newer items. Check expiration dates and make sure that you will use the item before the deadline passes.
  • If you can't use it, donate it. Desginate a spot in your storage areas for items to donate. Items that we decide we don't like, or don't use anymore, or that we develop allergic reactions to, or free samples, etc. can be passed on to someone who CAN use them, which I love to do.

 Next week, I'll share my 10 favorite items to stockpile, as well as a few of my stockpiling failures, and my new stockpiling ideas for 2011!

Wednesday, November 17, 2010

Holiday Prep: Shipping Strategies Part 1


1. Make a list of packages you need to ship
If you're like me, you have at least a few Christmas gift recipients on your list to whom you will need to ship gifts this holiday season. Now is a good time to figure out who those lucky people are so that you can plan accordingly.

2. Purchase Packing Tape
Buy an extra one, because you will run out of tape on the first roll when you are halfway through packing everything up. I haven't figured out a way to avoid paying for tape; it's the only thing I purchase other than the shipping label.
3. Assemble Free Shipping Supplies
I've been shipping a lot of items this year as I've been working on my declutter challenge, and I'm proud to say that I have my shipping strategies down to a science. (Mostly.) I'm pleased that by recycling packaging that I receive, and using the resources at the post office, I've avoided having to spend money on anything other than packing tape and the shipping label itself! There are two ways I collect free shipping supplies:
  • Save packaging when shipped items are delivered to your house. I set up a storage area for shipping supplies in my basement so that when a package arrives, I can stow the useful packaging (boxes, air bags, bubble wrap, foam wrap, etc.) until I am able to reuse it. I don't save packing peanuts because they tend to make a mess. My favorite shipping material to reuse is a heavy duty plastic envelope. Turn it inside out, pack, tape, and seal. Presto!


  • Order flat rate shipping supplies from usps.com. You can order flat rate shipping boxes and envelopes online, and the post office will deliver them to you for free! The minimum number of boxes in an order is 10, so if you just need a few, it may make more sense for you to pick them up individually from your post office. It costs $4.90 to send a flat rate envelope or small box, and more for a medium  or large flat rate box. (I find that the flat rate envelope and small box are most cost effective, unless sending heavy items long distances, such as across the country.)

4. Schedule a Shipping Deadline
Look at the calendar and figure out when would make sense for you to ship your items. I like to strike a balance between shipping closer to Christmas (because my grandmother opens her stuff right away) yet early enough so that I can have it out of the way in time to focus on local preparations. Make it a priority to purchase/make/bake items to be shipped sooner rather than later so that you will be prepared to ship all of your items at once. Remember to schedule time to pack the boxes; this step always seems to take longer than I expected.

In early December, I will explain how I avoid going to the post office completely, as well as what I do if I absolutely have to go to the post office.

This is one way I am trying to get organized for the holidays. I hope it works for you!